写的比较仓促,有什么不足的地方,还请大家多多指点。评论区欢迎留言~
这个方法可以让OpenResty同时显示两种IP
适用于套了CDN,既想知道CDN节点IP,又想知道访客IP的客官们
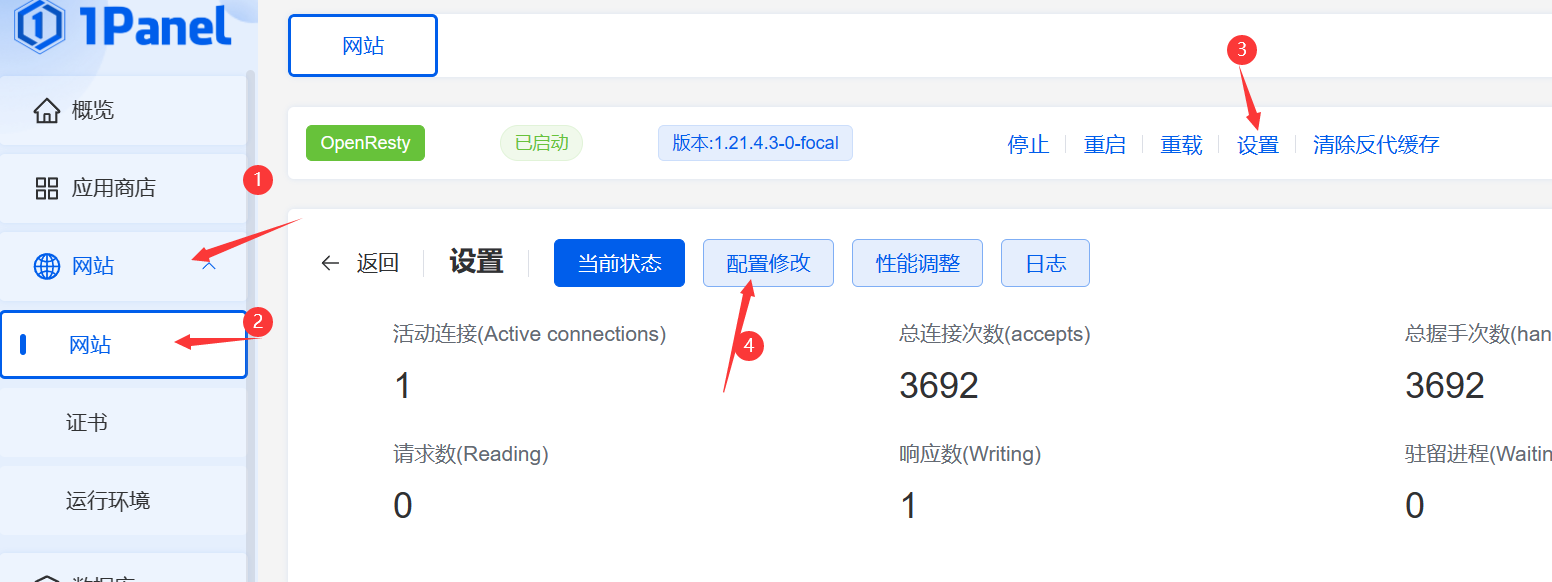
进入配置页面
- 点击
1panel左侧列表中的网站 - 点击绿色
OpenResty右侧的设置按钮 - 点击配置修改,进入配置页面

修改配置
参考以下代码块示例
1
2
3
4
5
6
7
8
9
10
11
12
13
14
15
16
17
18
19
20
21
| user root;
worker_processes auto;
error_log /var/log/nginx/error.log notice;
error_log /dev/stdout notice;
pid /var/run/nginx.pid;
events {
worker_connections 1024;
}
http {
include mime.types;
default_type application/octet-stream;
- log_format main '$remote_addr - $remote_user [$time_local] "$request" '
- '$status $body_bytes_sent "$http_referer" '
- '"$http_user_agent" "$http_x_forwarded_for"';
+ log_format main 'CDN_IP:$remote_addr - CLIENT_IP:$HTTP_X_FORWARDED_FOR - $remote_user [$time_local] "$request" ' '$status $body_bytes_sent "$http_referer" ' '"$http_user_agent" "$http_x_forwarded_for"';
server_tokens off;
access_log /var/log/nginx/access.log main;
access_log /dev/stdout main;
sendfile on;
|
下面是修改好的代码,不想看怎么改的客官们,Crtl+A全选,Crtl+C复制,Crtl+V黏贴,三连,应该就能用了
1
2
3
4
5
6
7
8
9
10
11
12
13
14
15
16
17
18
19
20
21
22
23
24
25
26
27
28
29
30
31
32
33
34
35
36
37
38
39
40
41
42
43
44
45
| user root;
worker_processes auto;
error_log /var/log/nginx/error.log notice;
error_log /dev/stdout notice;
pid /var/run/nginx.pid;
events {
worker_connections 1024;
}
http {
include mime.types;
default_type application/octet-stream;
log_format main 'CDN_IP:$remote_addr - CLIENT_IP:$HTTP_X_FORWARDED_FOR - $remote_user [$time_local] "$request" ' '$status $body_bytes_sent "$http_referer" ' '"$http_user_agent" "$http_x_forwarded_for"';
server_tokens off;
access_log /var/log/nginx/access.log main;
access_log /dev/stdout main;
sendfile on;
server_names_hash_bucket_size 512;
client_header_buffer_size 32k;
client_max_body_size 50m;
keepalive_timeout 60;
keepalive_requests 100000;
gzip on;
gzip_min_length 1k;
gzip_buffers 4 16k;
gzip_http_version 1.1;
gzip_comp_level 2;
gzip_types text/plain application/javascript application/x-javascript text/javascript text/css application/xml;
gzip_vary on;
gzip_proxied expired no-cache no-store private auth;
gzip_disable "MSIE [1-6]\.";
lua_code_cache on;
lua_shared_dict limit 10m;
lua_package_path "/www/common/waf/?.lua;/usr/local/openresty/lualib/?.lua;";
init_by_lua_file /www/common/waf/init.lua;
limit_conn_zone $binary_remote_addr zone=perip:10m;
limit_conn_zone $server_name zone=perserver:10m;
include /usr/local/openresty/nginx/conf/conf.d/*.conf;
}
|
引入配置
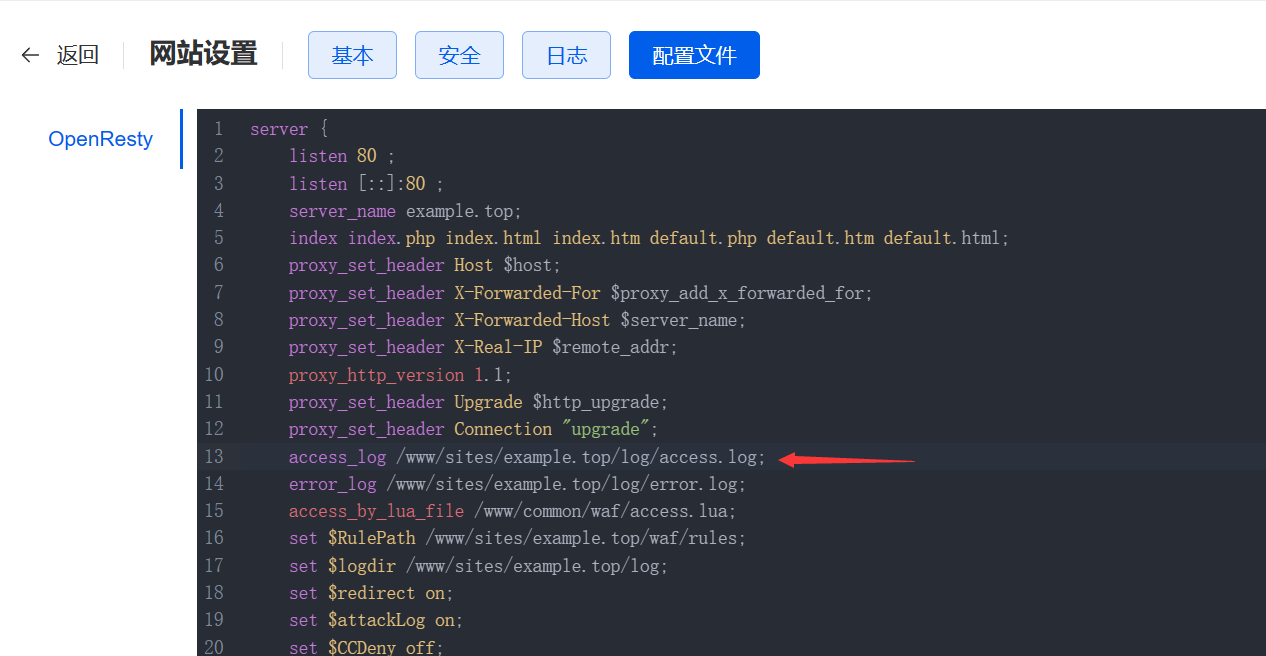
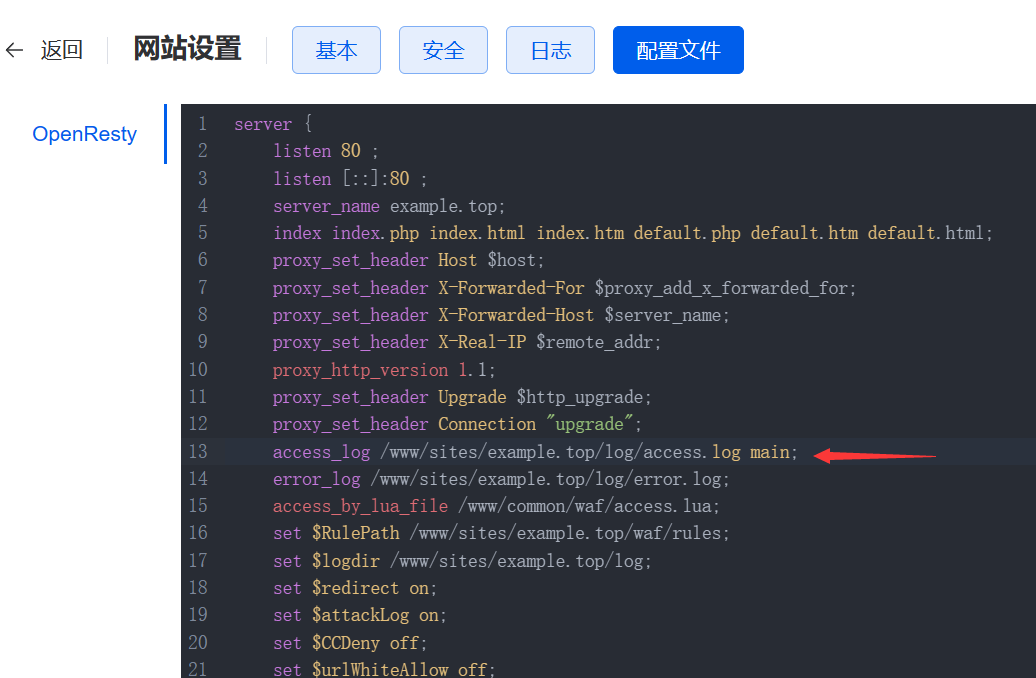
到此并没有结束,还需在网站的配置文件中的access_log项上追加一个main
在你觉的需要的网站配置项上添加就可以了,并不需要在每个网站的配置项上都添加
如下图所示
- 点击
1panel左侧列表中的网站 - 点击你的网站名称或者右侧的配置按钮,都是可以进入配置页面的
- 点击配置文件,在access_log处的后面,添加一个main


代码块示例1
2
3
4
5
6
7
8
9
10
11
12
13
| server {
listen 80 ;
listen [::]:80 ;
server_name example.top;
index index.php index.html index.htm default.php default.htm default.html;
proxy_set_header Host $host;
proxy_set_header X-Forwarded-For $proxy_add_x_forwarded_for;
proxy_set_header X-Forwarded-Host $server_name;
proxy_set_header X-Real-IP $remote_addr;
proxy_set_header Connection "upgrade";
- access_log /www/sites/example.top/log/access.log;
+ access_log /www/sites/example.top/log/access.log main;
error_log /www/sites/example.top/log/error.log;
|
效果展示
如图,CDN_IP为CDN节点IP , CLIENT_IP为访客真实IP

说明
这个方法最初是在云雨论坛上看到的,原文放在下面了,博主本人是觉得挺好用的


